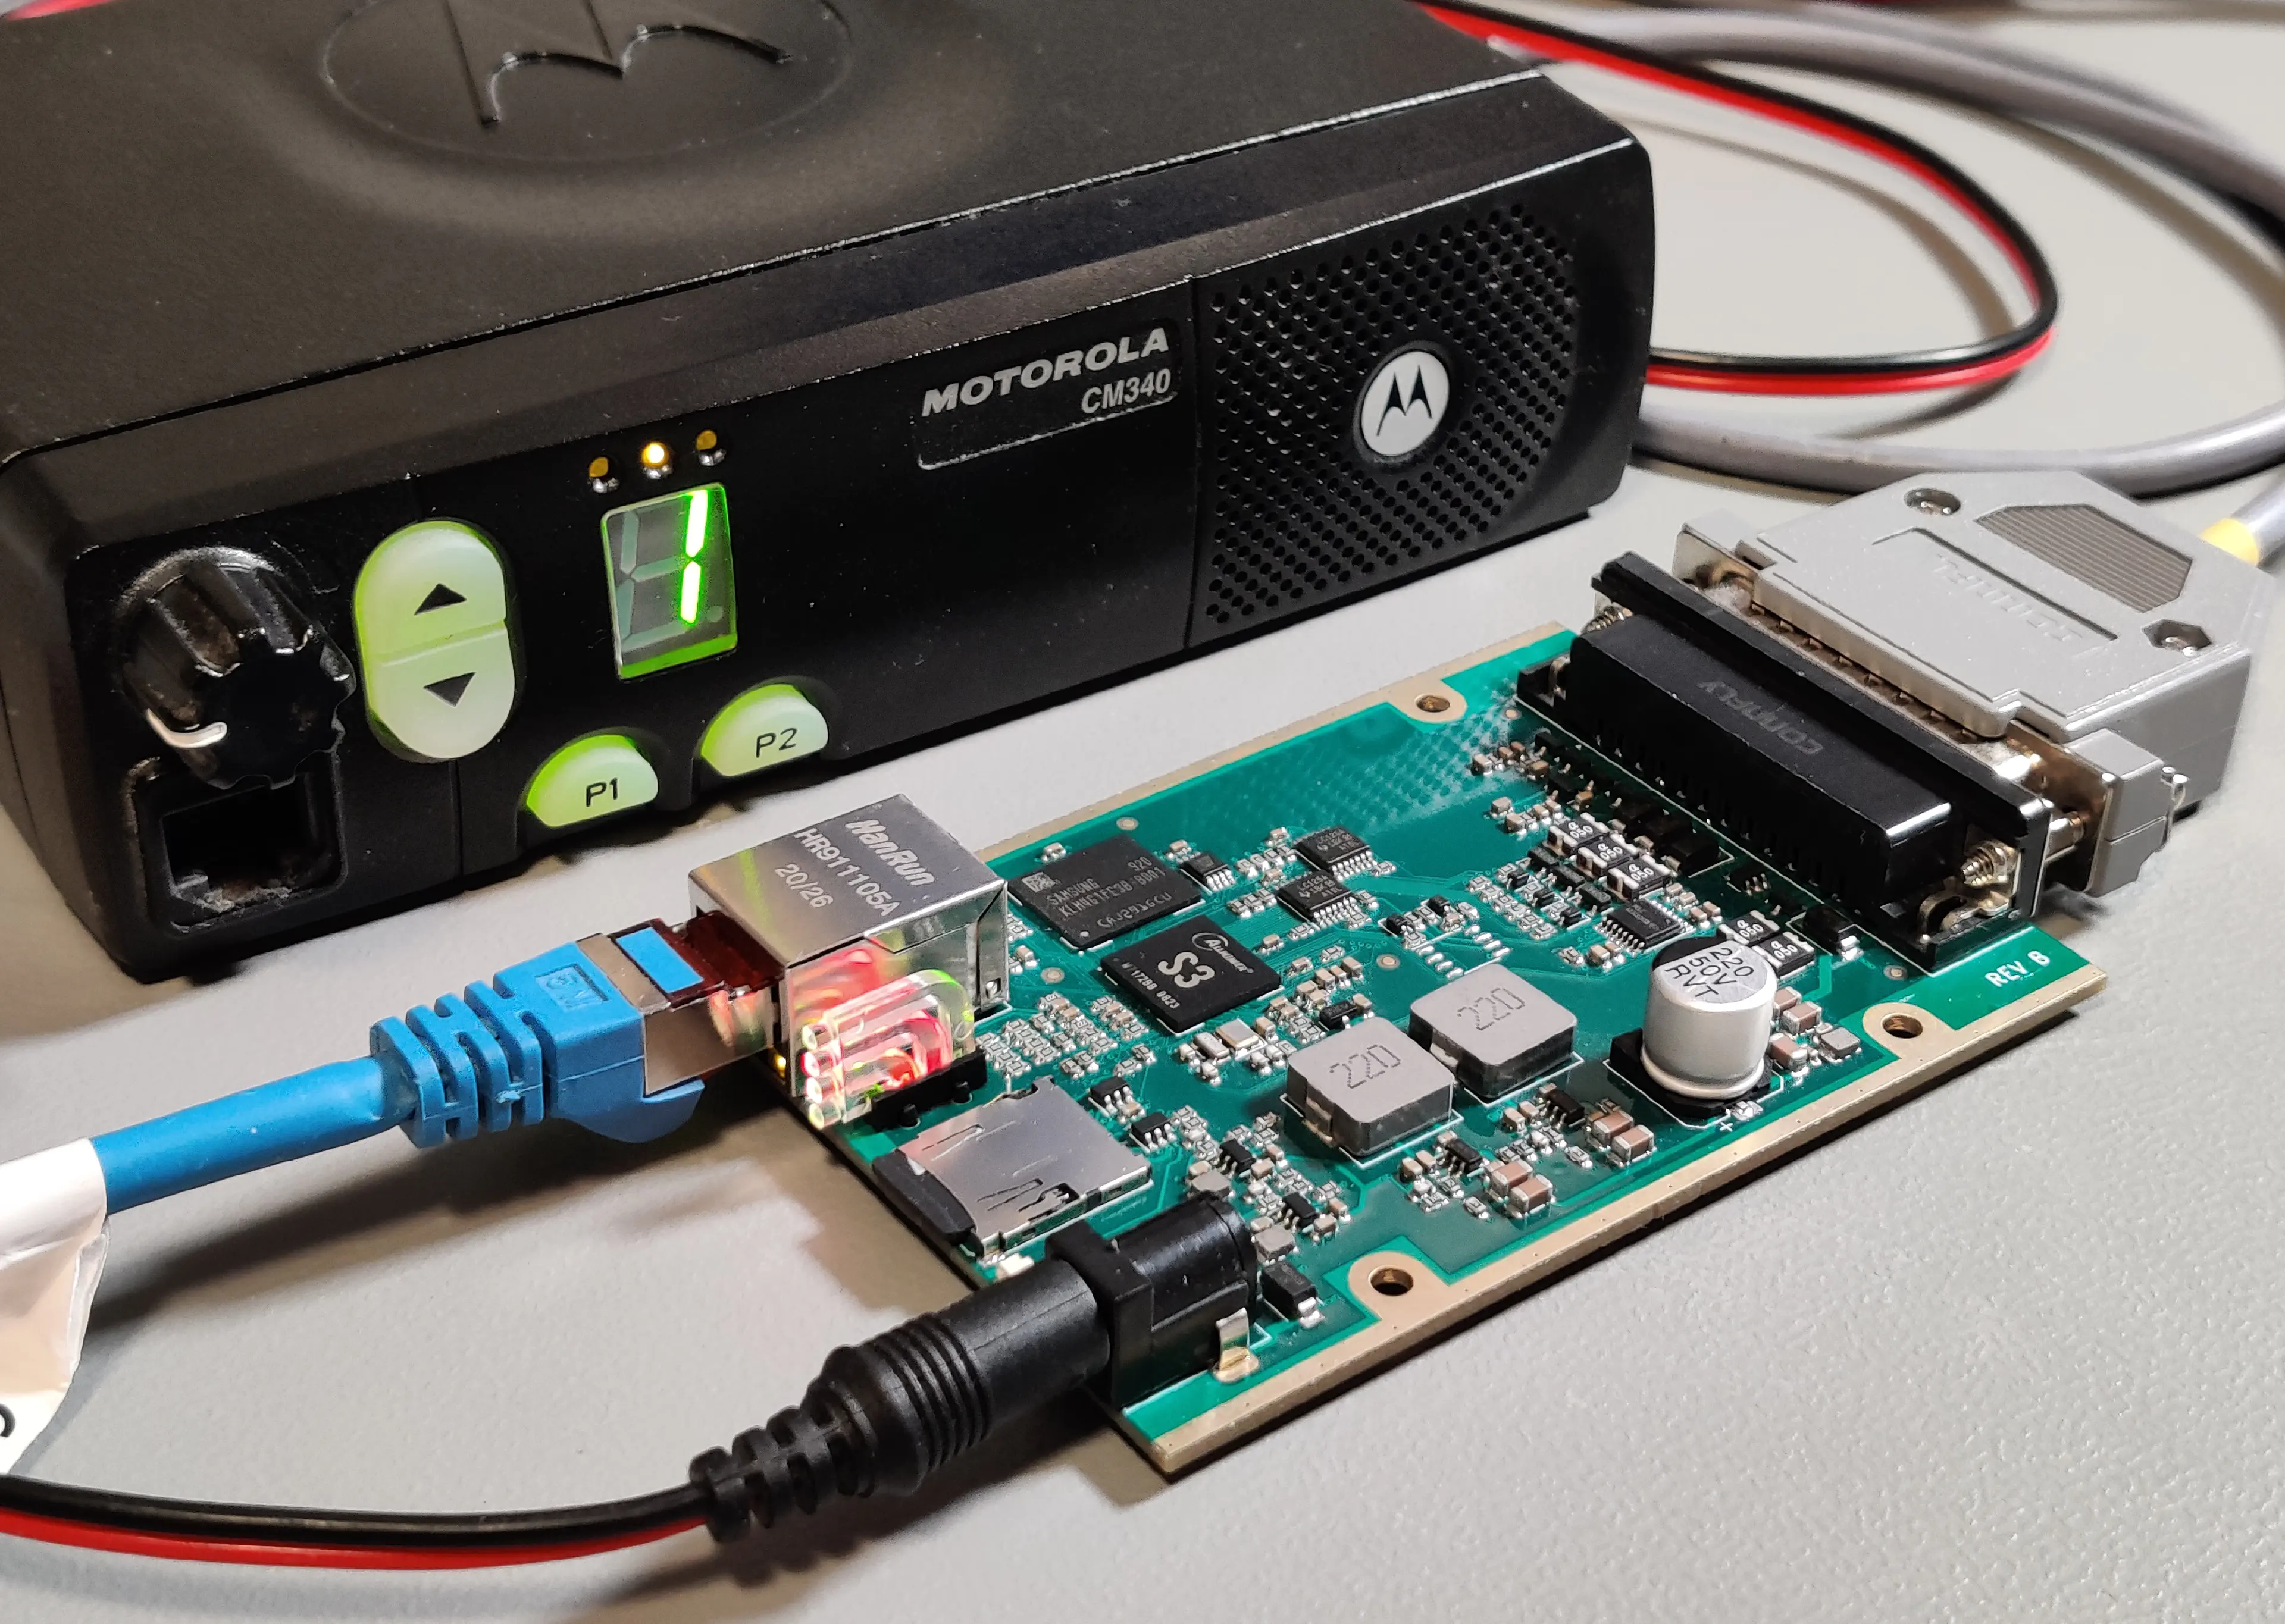
RoIP interface: Custom Single Board Linux Computer
Two way radio over IP interface based on a custom designed Allwinner single board computer running linux and C++ software
Hardware
Features
- 9V - 15V power input
- 100Base-T Ethernet
- DB25 radio connector
- 2 line audio inputs, 2 line audio outputs
- microphone amplifier
- 3 GPIOs (active low/open drain)
- USB (Host or Device)
- RS232 with RTS/CTS lines
- 3.3V UART (5V tolerant) with single-wire bus option
- 3.3V and 5V power output (500mA max.)
- 4 dual color status LEDs
- Allwinner/Sochip S3 SoC with integrated 128 MByte DDR3 RAM
- eMMC flash memory and SD card slot
Design iterations
STM32
My first design was based on a STM32 microcontroller, an I2S audio codec (WM8731) and an integrated TCP/IP ethernet controller (WIZNet W5500). The STM32F707VGT I used first turned out to be not powerfull enough for my application and had not enough flash memory. The W5500 ethernet controller was easy to setup, but couldn’t handle the network traffic generated by audio transmissions. Multicast wasn’t working ether. My first PCB had a RJ45 and a DB15HD radio connector, later I moved to the DB25 connector. To have large flexibility during development, I put in a large pin header to freely select the connector pinout.
When I decided to switch to a bigger µC (STM32H7), Covid hit and everything became unavailable. At this point I was still commited to the microcontroller-way, so I went with the Espressif ESP32, which beside a lot of memory also had excellent availability all the time. For networking I switched to the DP83848 ethernet phy, which worked flawless in conjunction with the TCP/IP stack lib within the Espressif SDK. I kept the I2S audio codec because I wanted to have the gain control functionality provided by the WM8741 without additional hardware effort.
I never made a running board with the ESP32; I only messed around with dev boards connected together with some wires. When the Audo Codec and Ethernet Phy also became unavailable, I started looking for alternatives.
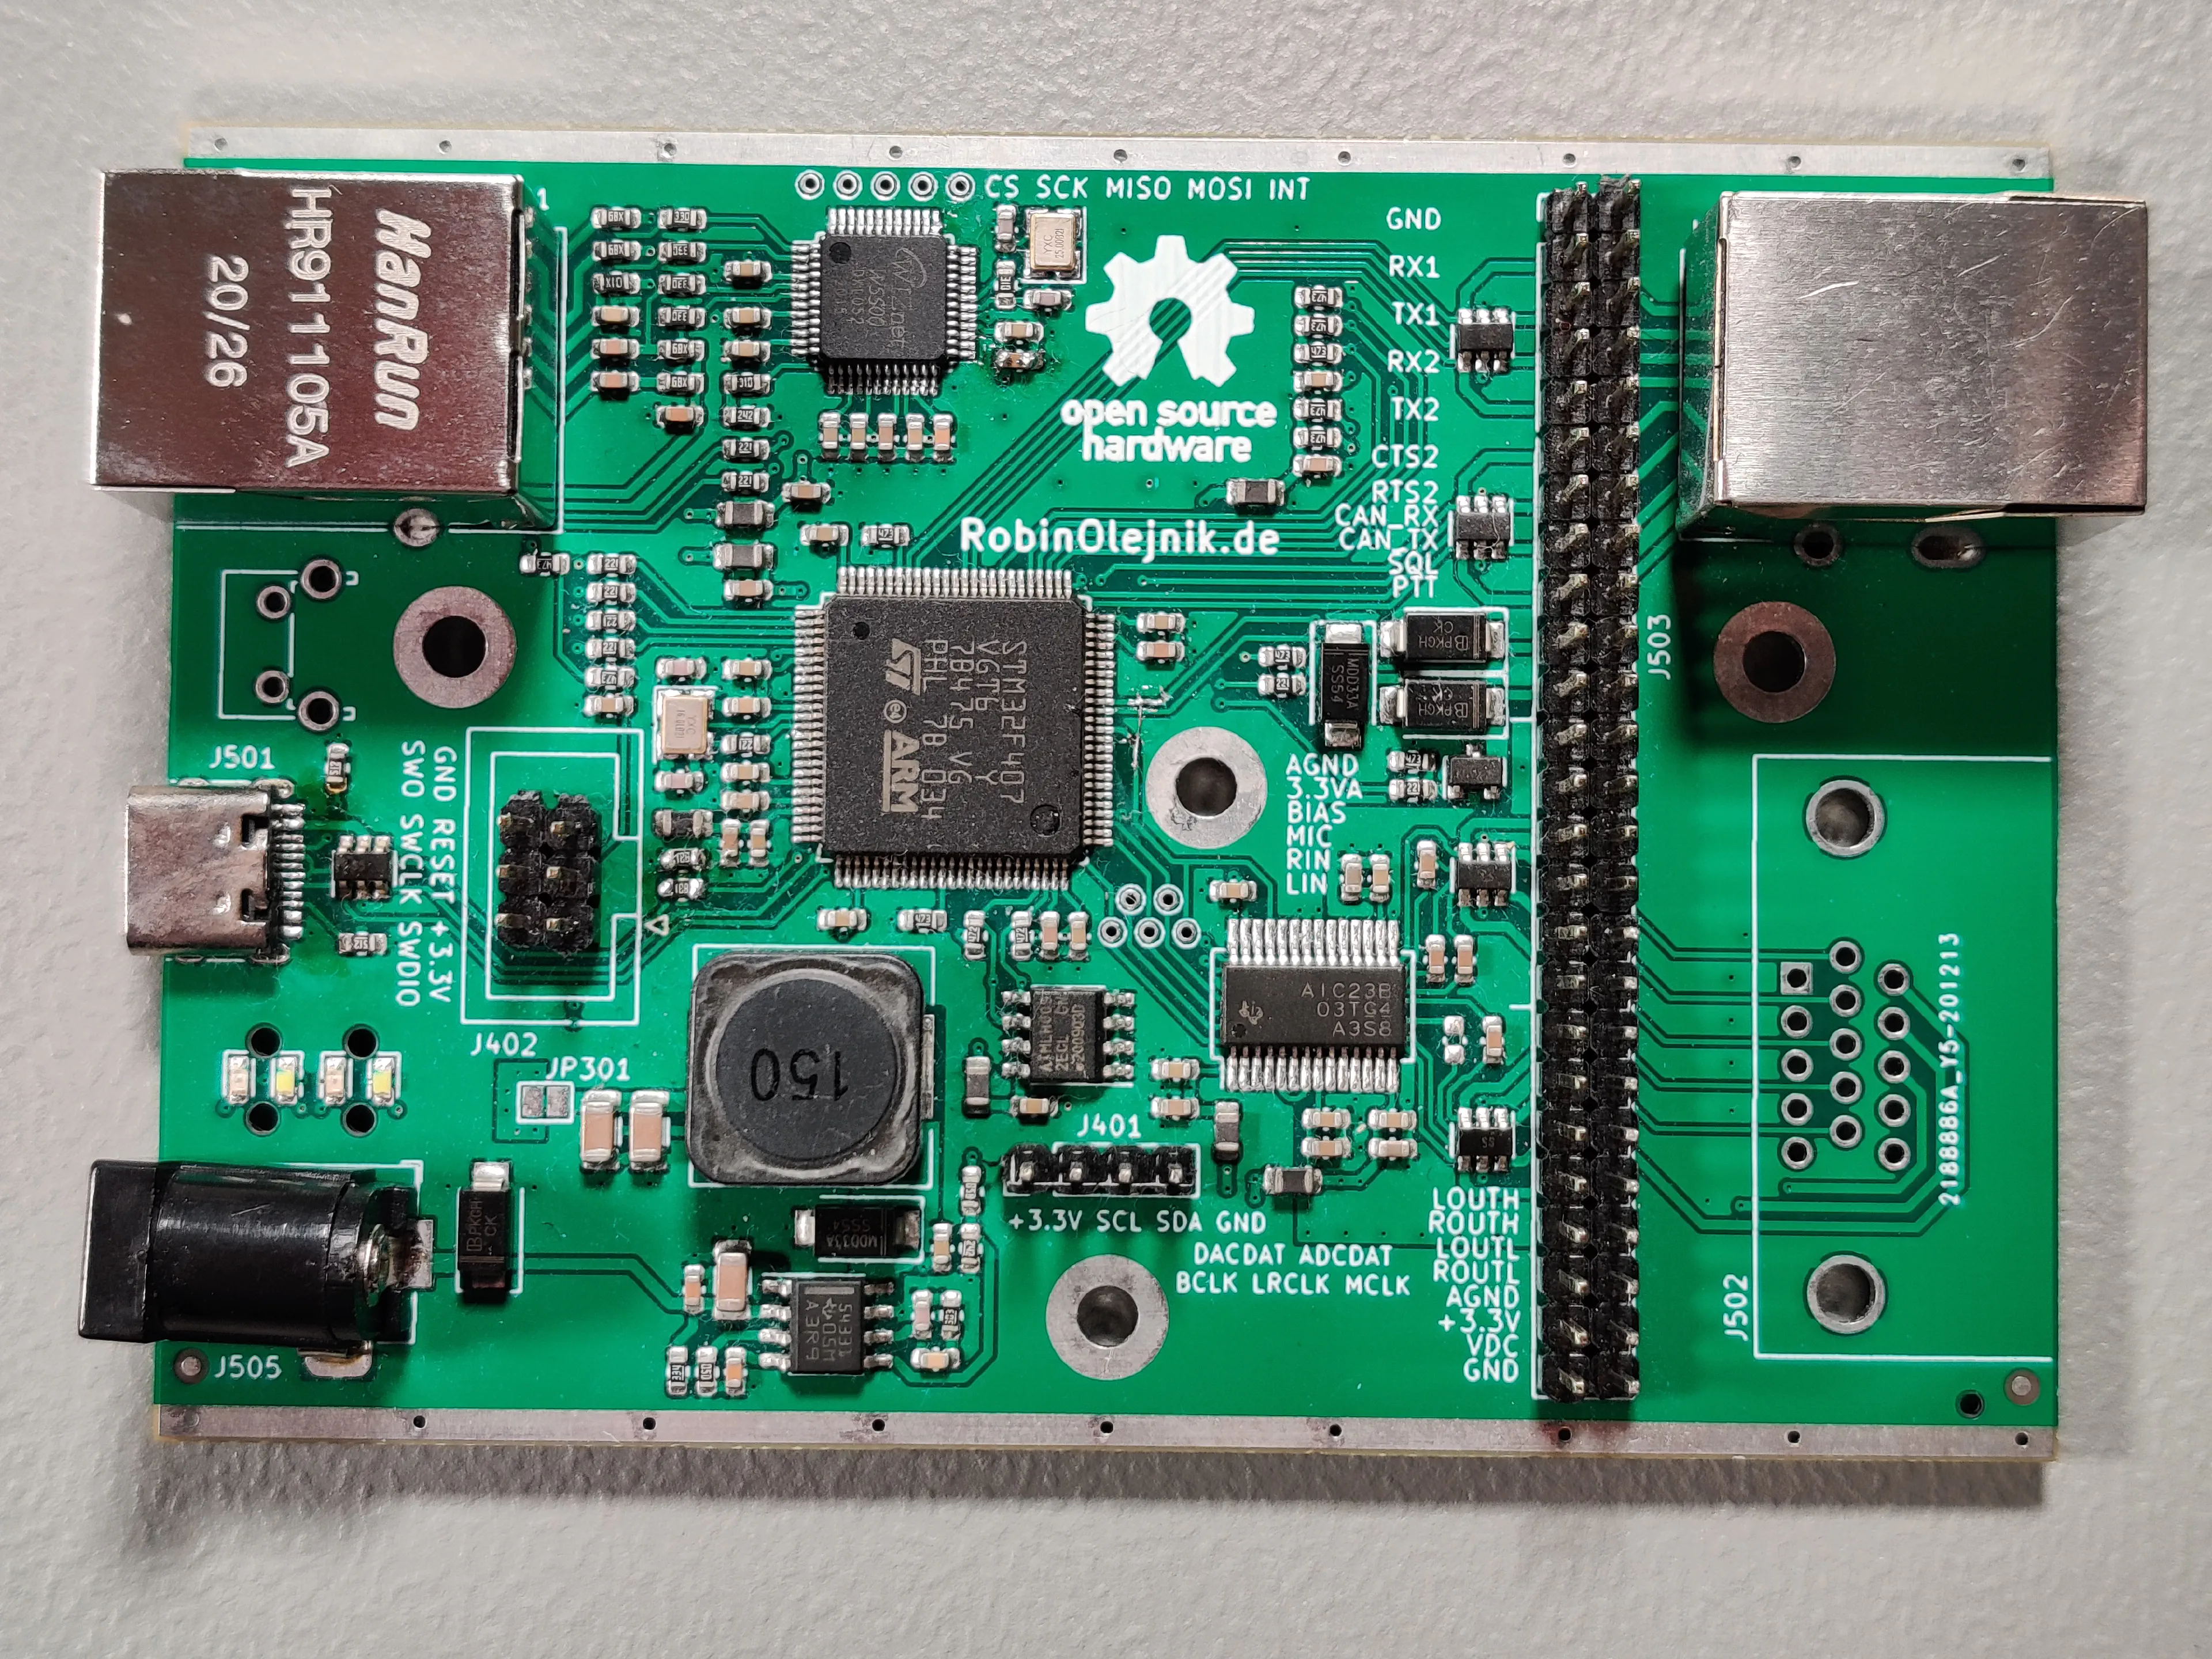
Allwinner S3 - Revision A
I had a Lichee Pi Zero board lying around unused for some time. It’s a development board with an Allwinner V3s, a 1.2 GHz Cortex-A7 ARM Soc with 64 MBytes of integrated DDR2 ram. Bringing that 128-pin LQFP chip to life was amasingly easy. There are ready made images available, but I quickly moved to my own custom linux created with buildroot. That way, I was able to include my own packages and modify the device tree, which is needed to use the available hardware interfaces (UART, Audio, USB, …). With some linux knowledge, the fact that the V3s is supported in mainline linux and looking at existing projects, that was a not too complicated task.
I already knew that running a full featured operating system would make it much easier for me to realize my project. Additionally, the Allwinner SoC integrates an ethernet PHY and an audio codec; I wouldn’t need separate ICs for that anymore.
While diving deeper into the SystemOnChip-stuff, I found the Allwinner/Sochip S3. Basically, it has the same core as the V3s, but contains bigger 128 MByte DDR3 memory. All inside a BGA package, which gives me a lot more GPIOs.
When putting together the first PCB, I was a bit nervous about the BGA. I never worked with a package like this before. My worries turned out to be completely unnecessary; Placement and soldering went smoothly without the need to rework anything.

For my first revision I decided to use the TPS5431 buck converter from Texas Instruments. Apparently, I only got fake chinese clones and the output voltage was inconsistent and always way too high. I ended up frying my first board with 8V on the 3.3V rail…
After powering a second board with an external supply, it immediately booted into a linux command prompt :) Network, USB and other interfaces were also working fine.
Initially I kept the I2S audio codec to compare it to the integrated one, but removed it later.
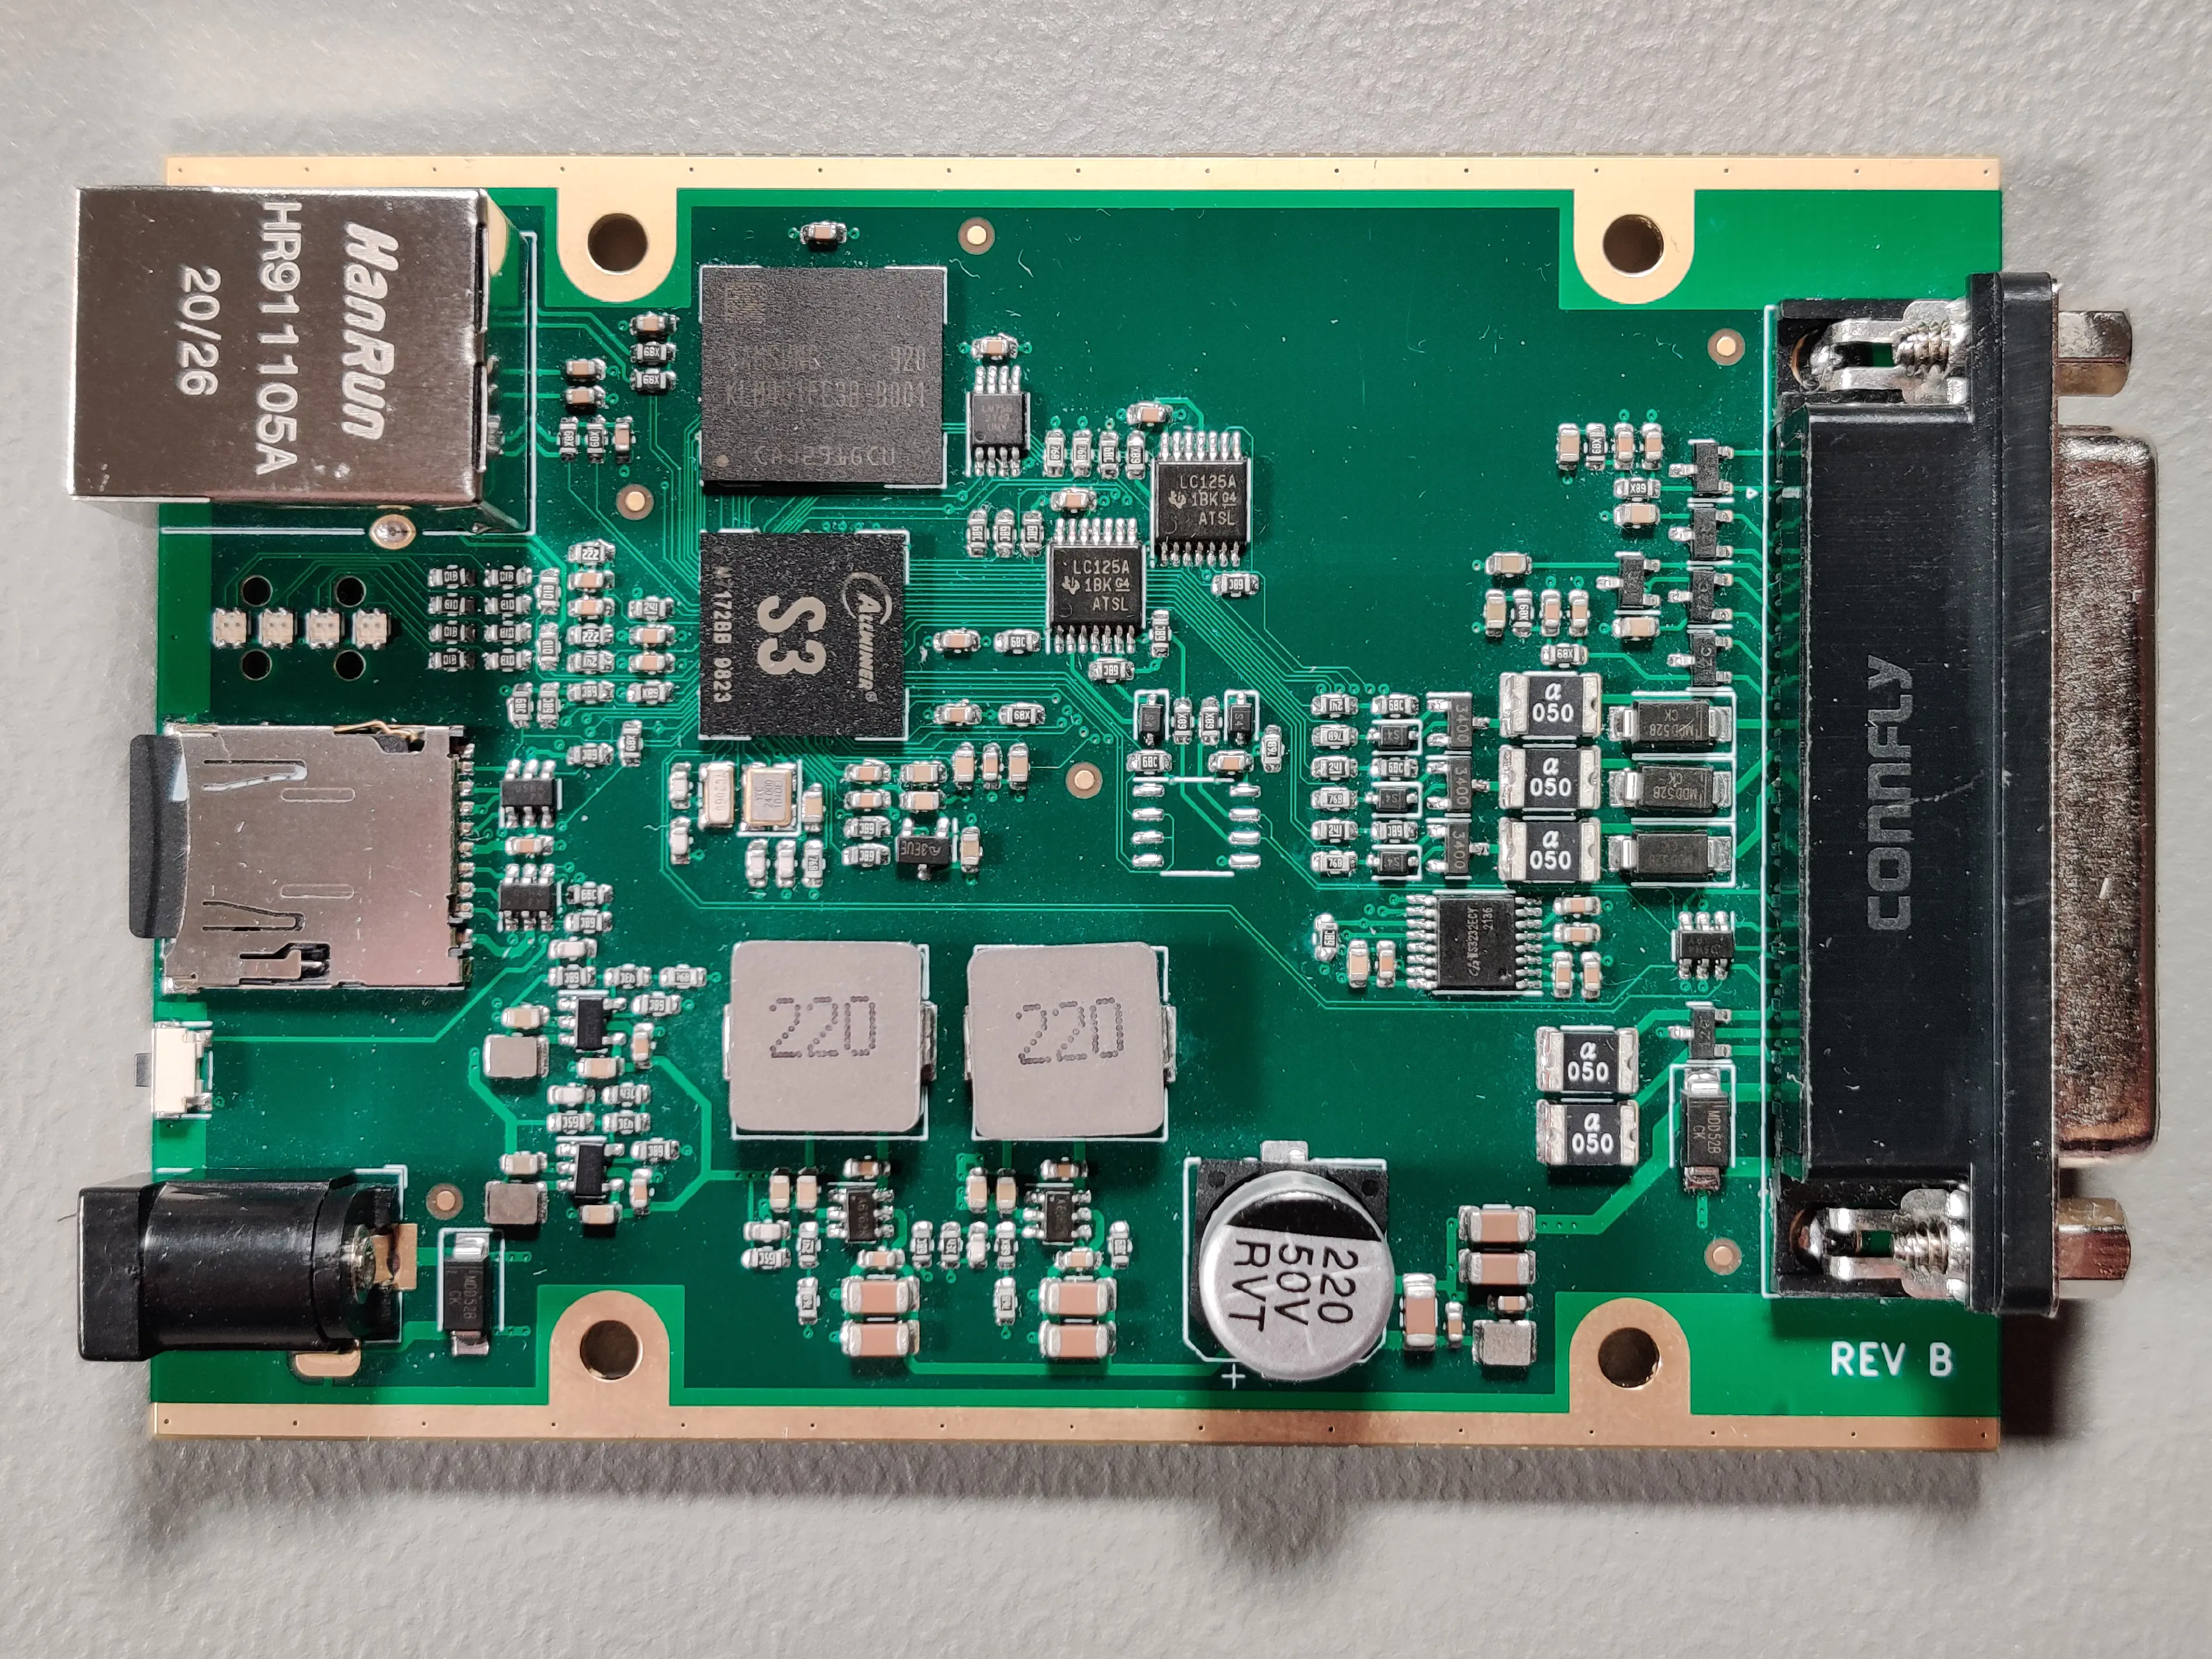
Revision B
To address the power issue, I replaced the two step-down-converters with the chinese MT2492. At that time in 2021 there were no cheap alternatives from established western manufacturers available. It’s working as intended now. I still have to determine the conducted emission situation with that part, though…
Another issue in revision A was with the DDR3 RAM. I got kernel panic and other errors when using more than ~20 MB of memory. I noticed this when SHA256 gave me a different hash of the same file on every execution. In other project’s schematics I found a SoC pin, that was connected to a voltage divider and two decoupling caps. In the datasheet, the pin is associated with the DDR memory, but undocumented otherwise. In the second revision with the divider added it’s working flawless now.
Revison C
Before I accidently missed connecting some power lines on the eMMC-memory. Oddly, this resulted in it only working in 1-bit mode. For my next PCB I completely rewired every connection to the BGA.
I’m also redesigning the serial port interface; I already was able to remove one IC while keeping the same functionality. I’m using tri-state buffers to switch my UARTs between the RS232 interface and a single-wire-bus, which is used by Motorola radios for communication between the radio and the control head. Previously I had some voltage level issues on the bus circuit which I think I solved now.
Right now I’m still working on the (hopefully) final layout.
Software
My hardware is compatible with SvxLink, which is well established in the amateur radio world. However, since I primarily have commercial LMR/PMR applications with specific needs in mind, I’m working on my own software, written in C++.
A list of planned features (some are working already):
- multiple, independent channels
- various network protocols: Zello, ED-137, P25 DFSI, …
- remote control of commercial and amateur radios (MOTOTRBO, TETRA PEI, analog radios, …)
- call recording
- SIP phone
- multiplatform: Windows and Linux
For the user interface I’m working on a React/Material-UI based single site progressive web app that works offline without an active internet connection. In addition it will also have the possibility to store the user configuration in the cloud (GraphQL API with a postgresql database). Later, this website could also be used to configure the RoIP-interface
For details on the software I will create a separate blog post.
Topics I’ve learned about
This PCB is my most advanced project so far. The circuits and boards I made previously were only one-offs; With this interface I set my goal to make it actually manufacturable. This has brought some challenges that I’ve never had to deal with or cared about before:
- Compliance- and EMC-oriented design
- ESD protection
- switching power supply design
- PI power input filter
- layer stackup for optimized return paths
- conducted emissions precompliance testing
- Design for Manufacturing
- BOM consolidation: reusing parts, small number of different parts
- part availability and sourcing
- single sided SMT assembly
- small through-hole part count
- easy final assembly into case
- PCB Assembly
- solder paste application with stencil
- BGA handling
- manual SMD hand placing
- hotplate soldering
- Custom linux development
- Buildroot
- U-Boot bootloader
- device tree with overlays
- kernel patching